Allergy-Friendly Marshmallows
- Egg Free Mama

- Jan 11, 2021
- 3 min read
So I've been playing around with this recipe for a while and I think I've cracked the code on egg-free marshmallows that are also aquafaba (chickpea water) free as well. These are not vegan, as they use gelatine and I've never attempted them with agar agar or any vegan substitution. What they are, is super duper easy to make and also free from high glucose corn syrup! So many wins! They're squishy and bouncy, and take nicely to food colouring if you want to mix up the look. I can't wait for lockdown life to be over so we can have a party with a hot chocolate bar stocked with a variety of allergy-friendly marshies!!! Oh, did I mention, you don't need a thermometer for these?
Ingredients: 4 sheets of organic, grass-fed unflavoured gelatine (if you want a softer marshmallow, 3 works as well but the result is much stickier)
1/4 cup of hot (NOT boiling) water
1 cup cane sugar
1/4 water (any temp is fine, additional to the water listed above)
1/4 cup agave syrup (if you want bright white marshies, use the white. If you're dying them, the golden works just fine
1 tsp vanilla extract (again, if you're making white marshies, use white vanilla) or sub in whatever flavour extract you want, the possibilities are endless!
*optional food dye of choice
cornstarch and powdered sugar for storage.
Directions:
Dissolve gelatine according the packet instructions and set aside.
Using a small sauce pan, combine cane sugar, 1/4 cup water, and agave syrup. Bring to a rolling boil, stirring frequently to prevent crystallization. If you are dying your marshmallows, I like to add the food colour directly to the syrup during this stage to ensure it will mix evenly. Let boil approximately 1 minute and then remove from heat.
Meanwhile, squeeze your bloomed gelatine and add it to the bowl of your stand mixer (fitted with the whisk attachment) along with the hot water. Turn you mixer on a medium speed to help the gelatine dissolve, then increase the speed to high and leave running.
Slowly (and carefully!) drizzle your hot syrup mixture into the gelatine with the mixer running on high speed, using the side of the bowl to keep from splashing. If your mixture is splashing, cover your mixer with a clean tea towel. Once the syrup is fully added to the gelatine, add your vanilla or other extract.
Leave running on high until the mixture is glossy, fluffy, and leaves stiff peaks when you remove the mix. I takes anywhere from ten minutes to twenty minutes, depending on a variety of variables such as the humidity level in your kitchen. When the mixture is about three times the size, it is ready to be molded.
I like to use silicone sphere molds, but a 9 X 9 cake pan that is well greased and parchment lined will work, giving you square marshmallows instead of half-spheres. If using the molds, a piping bag without a tip is a great tool.
Cover your marshmallows with greased plastic wrap in the fridge overnight. They should come relatively cleanly from the mold once they are set.
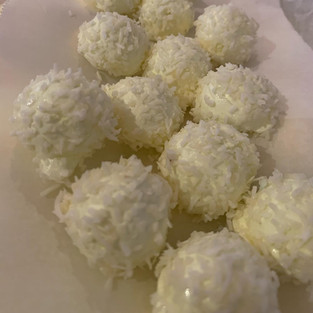
To store, combine equal parts cornstarch and powdered sugar in a bowl and dredge each marshmallow in the mixture before storing in a parchment lined air-tight container. I like to place parchment between each layer of marshmallows to prevent sticking. Shredded coconut is another option for finishing your marshmallows and keeping them from sticking to one another.
These keep on the counter for a really long time, and can also be frozen. I would not store them in a refrigerator, as this can cause moisture which will dissolve the marshmallows.


Comments